Before reading on this post, I would recommend if you have not gone through the part-1 to part-4, then please read them first and then continue reading from here.
Open the page where you have Visio Web Access web parts where you have displayed Visio diagram in the web part. Edit the page and add the list which is used as a source for the Visio diagram. In our case it is Server Details list. Add that list to the page.
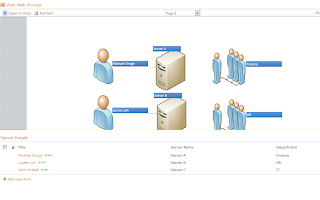
We will try to cover all options that Visio web access web part gives us for connectivity.
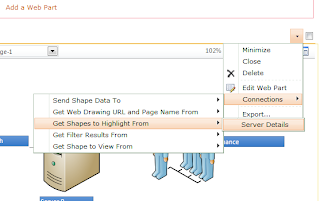
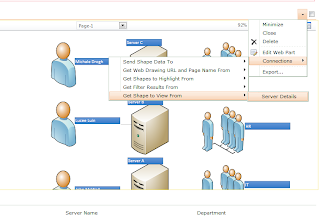
Edit the page, edit the Visio web access and click on connection.
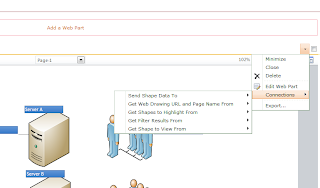
Here as you can see we have total five ways to connect to source and update the diagram and increase the interactivity with the source.
But before we go ahead and check out each option, there is one very important change that we need to make to the Visio diagram is to name those Shapes properly so that the source can identify the proper filter.
We need to have name of the shapes similar to the list items name.
First where do we see the name of the Shape in rendered diagram?
Here is an answer, select any shape; click on the right side square (highlighted in green) and here is what you get.
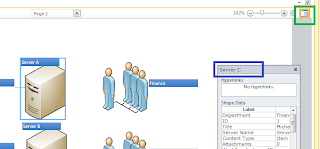
The one which is highlighted in blue is the name of the shape. If you see in this diagram I have the name as Server C which is the value of one of the list items server field.
So open your Visio diagram in Visio Client.
Now where you can find the name of the shape? There is no where you can see the name of the shape. It’s neither visible on the diagram nor is there in the property of the shape.
Well, here we need to enable one more option which is the developer tab in the ribbon.
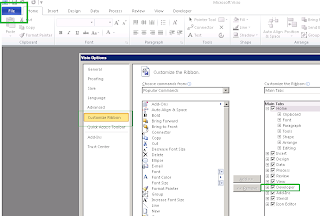
Now then you have developer tab visible in the ribbon. Click on the shape and then click on developer tab, click on shape name. There you can see a shape name. You need to change the name of the shape to reflect the value of the list item. Then only you would be able to perform all connectivity operations.
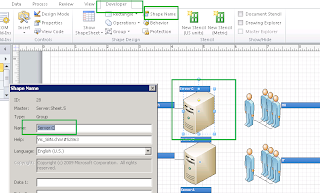
Make all the necessary changes and then upload it to the SharePoint library again to reflect these changes there on the server.
Let us deep dive in to each of the options one after the other.
1) Send Shape Data To
Here when we click on the shape it sends the data to the source list that we’ve placed on the page. To have this interactivity, to connect Visio diagram and list through this option, edit the web part. Click on connection, select Send Shape data to and then select your list.
This is how we can send data when we click on shape in the diagram and accordingly list shows up the data.
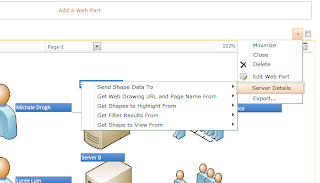
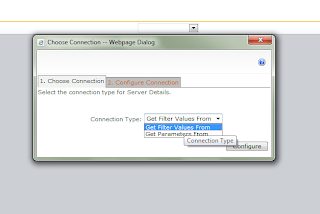
And then it asks you to configure the input. Select get the filter value from
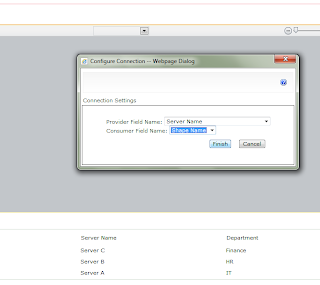
And then provide the association. Here we are associating the name of the Shape to the Server Name. Only one shape can be linked with the list.
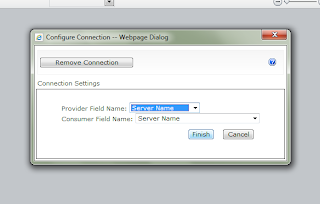
Click on finish.
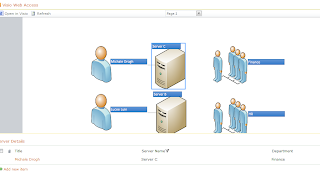
Once you are done with this step, then go ahead and click on any server name, the respective list item will appear in the list view web part.
2) Get Shaped To highlight From
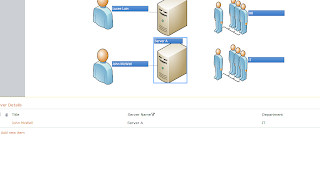
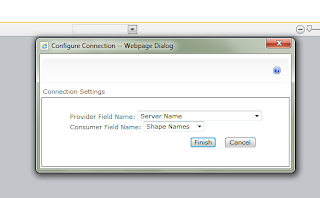
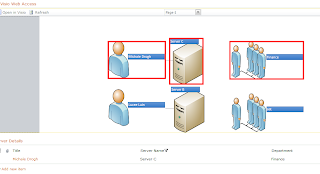
Here we can click on particular list item and based on our selection, the Shape gets highlighted based on the connection that you’ve set up. We will set up a connection for server name field from list to shape name to Visio Diagram.
Now when you select the list item, corresponding shape gets highlighted
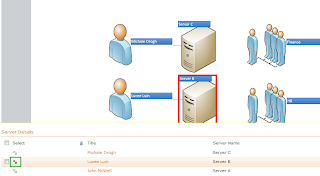
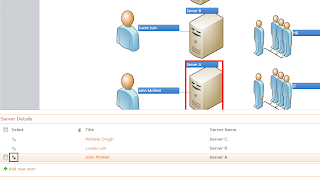
Red color which is highlighted is not something that I’ve highlighted to show you. It is highlighted from SharePoint Visio Services.
3) Get Filter Results from
Here you can filter the list items, and based on filter Visio highlighted that entire list item matching figures or diagram.
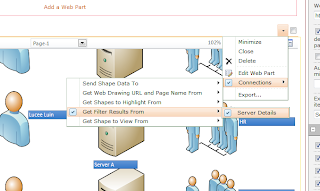
Here you do not need to configure any parameter values from either side.
And once you have set this then.
Putting filter on Server A, gets us this.
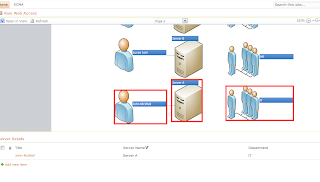
Putting filter on Server C, gets us this. This filter works with anything. It can be with title, department etc on any list field.
4) Get Shape to view from
Here the potion in the diagram is highlighted by getting that portion to the center of the Visio web access diagram web part. It actually comes in center to highlight that.
Define the relation between web parts.
Select First list item and you get associated shapes to come in center
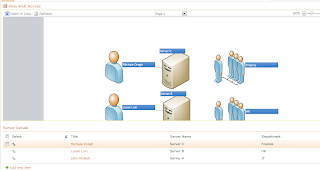
Select Last list item and you get associated shaped to come in center
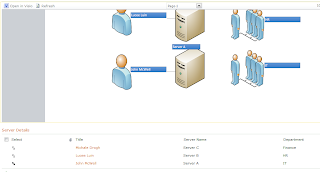
5) Get Web Drawing URL and Page name from
The advantage of having this connection in place is that you can have one single Visio web access web part on a page but can define different Visio diagrams to be rendered in that.
Use one Query String filter web part. Give the query string parameter a name and then connect that web part with the Visio Web Part.
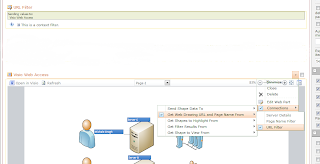
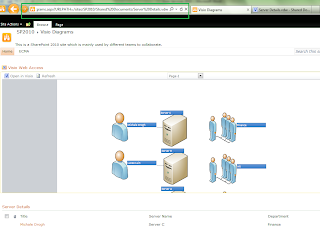
And then when from some other link you are navigating to this page, just pass Query string in to the page like what I have done. My query string name is URLPATH and I am passing the path where this Visio diagram file is uploaded.
And when passed in this way, it rendered the Visio diagram in Visio web access web part.
I hope the entire series will help you a lot to understand the basics of Visio services. We will explore more into this when we get a more chance to explore. There is a scope even to write all these connections with programmatic approach. do try it this till then.


1 comment:
Only one word. Fantastico.
Post a Comment