Friday, April 29, 2011

Managing user alerts

Managing user alerts is very important aspects of administrator. Many times we come across to a requirement asking Is there any way where I can see list of all users who have subscribe for an alert. Answer is yes, there is.

However, this can be view only by site administrator with full control and of course site collection administrator.

To view all user alerts, go to site settings - > User alerts under site administration. When you click on it and you come on the page where you can see list of all users who have subscribed for alerts.


Select specific users and then click on update, this will show you all alerts been subscribed by that user and from there you can remove the alerts if you want.

This might be useful because of one drawback that alert has. If you subscribe alert more than one time on same list for the same alert settings; i.e. let’s say I have subscribed for getting an alert if someone changes an item created by me. And I did the same procedure to subscribe for the same alert two times more, then when someone changes the item created by me, I will get three times alert not one time which is really a big problem for high level position people in the company and not acceptable at all.

Hence administrator will see alerts been subscribe three times, so admin can come here and remove duplicate alerts.


Individual user can manage alerts from their alerts section of the site and do the same thing, it’s just that administrator can see all user’s alert. Although this is tedious job to do; but it solves the purpose.

Thursday, April 28, 2011

Understanding document set - Part 1

One of the cool new features available in SharePoint 2010 is document set. We can consider document set as a folder in which there can be one or more document resided. Consider it a folder with advance functionalities.

Document set is a collection of documents. Documents can be word, excel, PowerPoint or simply any office document.

Document set is a content type, so ultimately we are defining what all content types are allowed in a document set and then we can create a document set based on those content types.

Example, let’s say you have one project going on and you have a defined process to prepare some documents for the project. First requirement document is being prepared, then some technical draft is prepared, at the same time some budgeting proposals are prepared and then sales plan document is prepared.

There can be a scenario where all your documents share common metadata properties, and then you might want to club those documents into one for easy search and version control.

If you have some process or fixed set of documents for some reason then you can combine all those documents into one single document set.

Document set has a default web part page that comes when you open the document set which gives us the information on properties of the document set and shows all documents that are part of the document set.

Some of the advantages of document set are:


1) Common metadata for all documents in document set
2) Automatic creation of documents when setting up the document set
3) Web part page that shows the properties of document set and which is customizable. We can have a dedicated customized web part page per document set if we want.
4) Document set has their own ribbons to carry out actions related to document set.
5) One of the main advantages is workflow directly on document set rather than running individual workflow for each document in document set.
6) Versioning on document set rather than versioning on each document in document set.
7) Permissions can be set on document set rather than each individual document.
8) Download all documents as zip package rather than downloading individual document.

Explore more in to see document set in action in part 2

Wednesday, April 27, 2011

Creating external lists in SharePoint 2010 – Part 2

Here we are with part 2. If you have not gone through part 1, then I recommend you reading part 1 first before proceeding. Once you are done with reading part 1, then come back and read this part 2 to understand it bit more.

Now remove the Employees list from the SharePoint site we created earlier. Now open SharePoint Designer 2010 and open the Employees external content types.

Click on create list and form.


Then give name of the list and description. System instance will be Employees because as of now we only have one external content type in my system.


Click on Ok, it will display creating Employees list


Go back to the SharePoint site and check that list has been created. Also make a note that it shows that list is external.


If you create InfoPath form, then it appears like this

Friday, April 22, 2011

Creating external lists in SharePoint 2010 – Part 1

Now with SharePoint 2010 it is possible to create a list from other external sources with the help of external content type and external lists.

You can connect with any external source and can create a list from that. In this example, I am going to show you how to create a list from the SQL server database.

The advantage is you not only can view, but also insert, update and delete as well using external content types.

You can create external lists from designer as well as browser. In this part we will see how to create it through the browser and then in next part we will see how to create with the help of designer.

But even to connect with a list from the external SQL server database, you must first create external content type from SharePoint Designer 2010.

So open the SPD2010 and click external content type and then create.


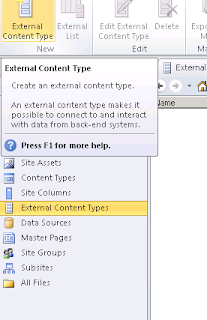
Click on the content type and see the screen that you get


You will see name, display name, namespace, version, office item type, and office sync. Office related options are useful when your external list resembles the fields of outlook options. Like if you have contacts external list which has fields similar to the contacts outlook option; or calendar options, then you can select these options. For us we are going to use generic list. Because our list is different and does not resembles any structure with outlook options.

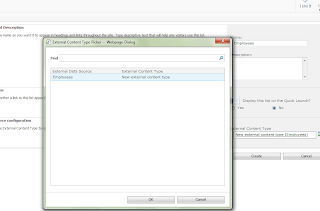
Click on the click here to discover the external data sources option.


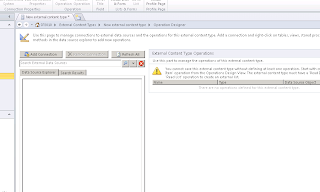
Now click on Add connection.


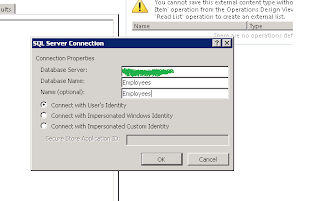
Select type SQL Server and specify database server and name.


Once you are done with this, it will discover the tables. As of now I only have one table and hence It is showing only one.


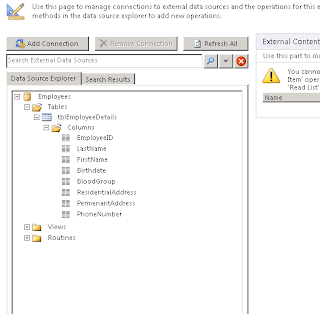
Now right click the table and select create all operations. Which will create insert, update, and delete operations.


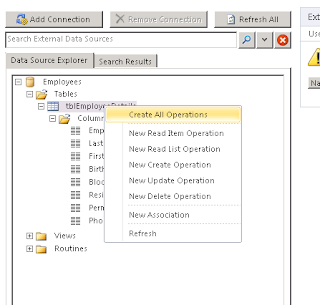
As you can see following wizard comes up which shows you the operations being performed.


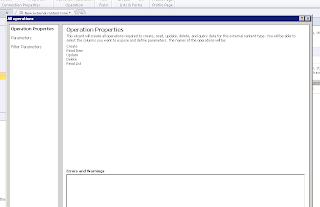
Have your at least one field set as map to identifier.


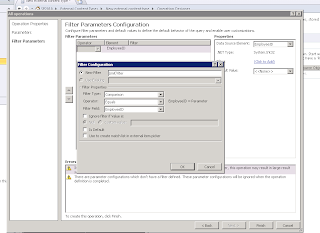
Click on next to set filter options. As you can see because external list table in our case may contains so many records and it is not advisable to return all records in one time and hence you can see by default warning message saying that you should at least mention limit as a filter parameters.

Add filter by clicking on add filter.


Click on Ok and then finish. Now we have our external content type set up.


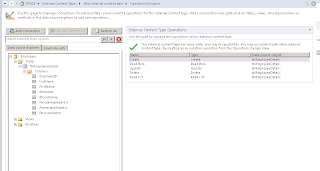
Click on save button to save the content type to Meta store.

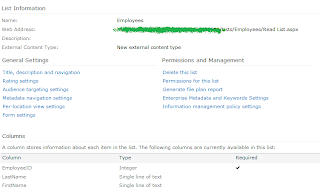
Now go to your SharePoint site and create external list.


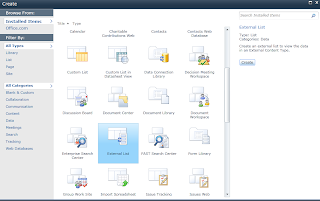
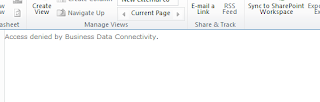
Click on create, so the list will be create. Now check that you might get this message.


Open central administration.

Application Management -> Manage Service Applications -> Business Data Connectivity Service


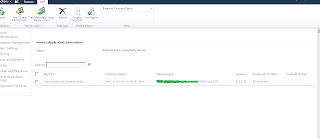
Now select content type and link on set metadata store permissions. Following screen appears.


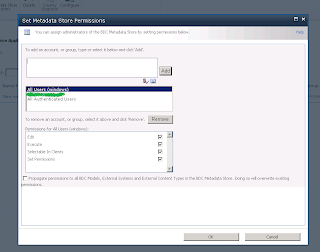
Now there is a possibility that you get blank section in the permissions for all Users (windows). Means you may not see any permissions listed in that block. Yes, and this is what I got. Well I also found a solution and the solution is to use PowerShell script.

PowerShell is a scripting language which is used to automate some tasks. It is same as how we write commands on the command prompt. But PowerShell has more power as name suggests.

Open run command prompt and type in PowerShell.exe and you get the PowerShell Window.


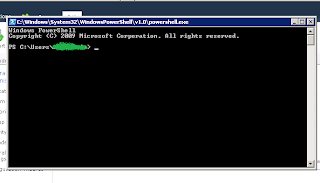
As you can see it starts with PS and it stands for PowerShell of course.

Now run these commands one after the other

$adminURL="HKLM:\SOFTWARE\Microsoft\Shared Tools\Web Server Extensions\14.0\WSS\"
$key = Get-Item $adminURL
$adminurl = $key.GetValue("CentralAdministrationURL")
Write-Host "Central admin site "+ $adminurl
Add-pssnapin Microsoft.SharePoint.PowerShell -ErrorAction SilentlyContinue

Write-Host Updating BCS persmissions
$obj = Get-SPBusinessDataCatalogMetadataObject -BdcObjectType Catalog -ServiceContext $adminurl
$right = (1+2+0x10+4)
$claim = New-SPClaimsPrincipal -Identity 'c:0!.s|windows' -IdentityType EncodedClaim
Grant-SPBusinessDataCatalogMetadataObject -Identity $obj -Principal $claim -Right $right
Copy-SPBusinessDataCatalogAclToChildren -MetadataObject $obj
Write-Host Complete


We would like to thank Jon for suggesting and coming up with this solution.

Once you perform the above step, you get the permissions in the metadata permission property box. Now assign permission to appropriate users and click on OK.

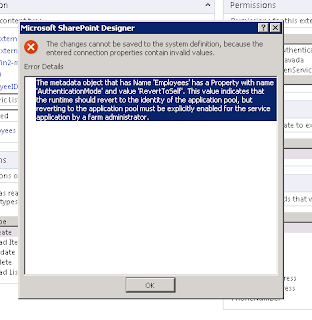
Now open the site and open the Employees list. Ok, surprise, one more error and this time it is following.


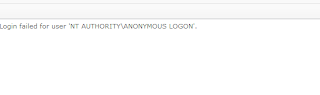
This error comes because when we create external content type in SharePoint designer 2010, it takes the user’s identity as authentication mode.

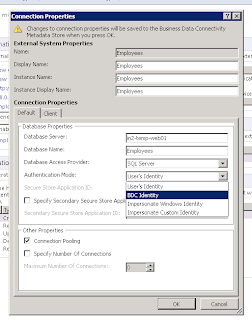
So let’s change the authentication mode from User’s identity to BDC Identity.

Open SPD2010 and open the external employee content type we created.


And now, we get this


Wow, another error. It seems like we are facing so many problems. Well, after resolving problem and get the solution is indeed is a pleasure.

So let’s put a step forward to get a solution.

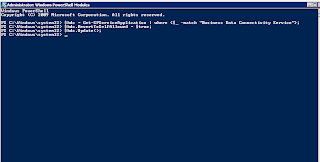
Now this time open Windows PowerShell modules by going to Start-Administrative Tools-Windows PowerShell Modules and use this script

$bdc = Get-SPServiceApplication | where {$_ -match "Business Data Connectivity Service"};
$bdc.RevertToSelfAllowed = $true;
$bdc.Update();


Now go to Employees external content type, open it and change it from User’s identity to BDC Identity and save it, this time it should not give you an error.

This should resolve this issue. As you can see we have set RevertToSelfAllowed to true through console. Because this property is by default set to false and it is disable in SPD2010. So we need to set it through the PowerShell.

And there we have it now. Open your site and open Employees List.


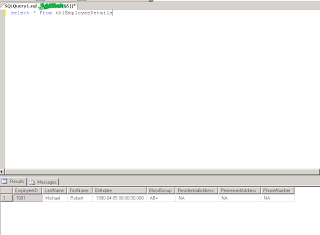
Click on New, enter the details


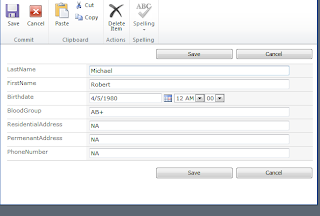
See, now we not only have the data in the list but also in SQL Server database.


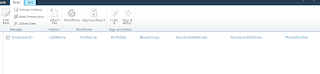
But yes, one very important thing to note here is that external lists neither participate in any event handlers nor participate in workflows. So if you see its settings page, you will not see any workflow options.


More to come. Stay tuned.

Thursday, April 21, 2011

Inline editing of list items in SharePoint 2010

This feature is some of the very much awaited features amongst all new features in SharePoint 2010. People like to edit the item without opening that item in window. Just like ASP.NET grid provides the way of edit and then update by clicking edit button and then updating the record.

Well, now this was possible in MOSS 2007 as well, but it required little trick, but with SharePoint 2010, it is easy to do that.

Just go to the view settings of any list and then enable the in line editing option.


once you set this, you can see edit button for each list item and then clicking edit button will change the item in to editable mode, after change you can save or cancel it. just like how we do normally.


You can also add item without opening a NewForm.aspx. Click on + sign below last list item, which will allow you to add item.


I am sure this simple yet very useful feature will be used by many. Isn't it?

Wednesday, April 20, 2011

Result is out

Finally the result is out.

It looks like MS still has to work more to retain his market share for IE. Chrome is a big challenge for them despite of many changes in IE9.

Tuesday, April 19, 2011

Determine External List in SP2010

There is a new concept in SharePoint 2010 which is called external list. you can fetch data from external entities and LOB. we soon are going to see in detail how we can get the data from external entities.

This is the simple method to determine if the list is external list or regular internal list of SharePoint. this may be important at some point because external list does not participate in workflows and event handlers. we cannot attach handlers on external list.

list.HasExternalDataSource is the property which tells us that the list is external source or not. (where list is a list object of which you want to check)

Monday, April 18, 2011

How to create Quick steps – Part 2

In this post, we are going to see how we can have a quick step in the ribbon tab group.

If you have not read first part, then i recommend you reading part 1 first.

We will add two quick steps in ribbon group; One for Google and one for Bing.

So open SPD2010 and connect with the site. Now as you can see that we can create multiple quick steps in SPD2010. The first one is List item menu which is ECB which we created in part 1. And in this post we will cover New and View Ribbon. Rest you can check on your own.


So click on New Form Ribbon. But before that note that now from SPD2010, you can create quick step for calendar as well. We have mentioned in previous post that it is not available from the User Interface from SharePoint 2010. So go ahead and select Calendar in the Lists pane and then click on New Form. So we are now creating quick step for New Form of calendar

Give it a new and description and specify 16 by 16 and 32 by 32 icon locations.


And now click on Calendar and click on New. There we have the Bing logo. Click on it and will take you to Bing search.


Changing the ribbon location changes the position and group of icon.


Here we have changed from Actions to Commit in the Tab.Group.ID and hence the output


Ideally this operation should be kept in the Actions group, as we are performing some actions not doing anything else. The aim is to place icon on respective operations group.

Do the same operation for Display form and this time add two custom actions; one for Bing and other for Google.

These are the sequence numbers


Changing the sequence number will also change the place of icon.

Friday, April 15, 2011

How to create Quick steps – Part 1

Quick steps are one click handlers that performs some operations. Now with SharePoint 2010 and SharePoint designer 2010 it is possible to define quick steps easily.

In this post, we are going to see how we can add new ECB options for list items and also see how to add button in existing ribbon tab. These both options are now possible with SharePoint Designer 2010.

Creating ECB menu option in MOSS 2007 requires creating feature targeting edit control block with CustomActions and deploying it on server.

However there is one limitation for adding control in existing ribbon tab. You cannot have JavaScript function, showing message, disabling controls etc. when creating quick step using Designer 2010. These all can be done via in feature. We will have a detailed post in this topic going forward which is a vast topic.

Open your existing site, open let’s say team discussion. As you can see New Quick Step option is available in customize list group.


If you open Tasks list, then


However there is one strange behavior, if you open calendar, you will not see this option. Not sure why? Well, have to look into this. If you know the answer, do post a comment and we will appreciate it.

Let’s go ahead and create one ECB menu option for lists. Open SharePoint Designer 2010. Connect with the site. If you notice, SPD2010 is way different from SPD2007. There are so many differences. SPD2010 looks very clean and clear. It gives very user friendly interface than SPD2007.

Click on Lists and Libraries and choose the list on which you want to create ECB menu item. I have chosen Tasks list.

Double click on the Tasks List to make it open on right side panel. Now check out the far end right button, and you will notice custom actions below workflows. We can create workflows and custom actions from here.


Click on New. Give the name and description. Here you can choose if you have your own page, you can send user to this page with parameters. If you want to initiate any workflow you can do that from here. Or you can also send user to any other url that you wish.

Just to demonstrate i am using Google image and redirecting user to google.com from ECB menu. So mention that URL, use 16 by 16 image of Google, which will be shown to user in the menu item. And finally click on OK. And you are almost done. Remember this image should be in the IMAGES folder under 14 hive. (New structure, not 12 hive like in MOSS 2007)


Open the site, go to Tasks list and create any item and see what you have in the menu now. New option Google. Click on it which will take you to google.com


If you want to edit or remove this, you can see options on left top side of SPD2010.


Share your SharePoint Experiences with us...
As good as the SharePointKings is, we want to make it even better. One of our most valuable sources of input for our Blog Posts comes from ever enthusiastic Visitors/Readers. We welcome every Visitor/Reader to contribute their experiences with SharePoint. It may be in the form of a code stub, snippet, any tips and trick or any crazy thing you have tried with SharePoint.
Send your Articles to sharepointkings@gmail.com with your Profile Summary. We will Post them. The idea is to act as a bridge between you Readers!!!

If anyone would like to have their advertisement posted on this blog, please send us the requirement details to sharepointkings@gmail.com