In this post
we are going to see how we can customize the access denied page in SharePoint.
Many times we wish we could display some other friendly message than the one
displayed by default.
First we
need to understand that this is a page under layouts folder.
So we also
need to create an application page. Open a project and add an item. Select
application page as an item to add.
Now go to
the layouts folder under template in 14 hive.
Locate
accessdenied.aspx
Open the
file in notepad.
Copy the
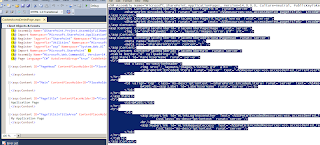
HTML from the accessdenied to our customaccessdenied page.
As of not to
test that we are in a right path, build the project and deploy the solution to
the SharePoint site.
Once
deployed, check that it is deployed to layouts folder and then open the site
and in URL type _layouts/customaccessdeniedpage.aspx
Change two
contents like this and then we will deploy again to see that changes are
reflected.
Deploy the
solution and check the page again.
As you can see
changes are reflected.
But now the
question is how we can actually bind this page to Web Application so that on
access denied error is taken to this page and not to the default access denied
page.
Here is a
powershell command for this. Execute this and check the access denied. You
should be good to go.
|
$site =
get-spsite "site url"
|
||
|
|
$webApp =
$site.WebApplication
|
|
|
|
$webapp.UpdateMappedPage(1, "/_layouts/CustomAccessDeniedPage.aspx")
|
|
|
|
$webapp.Update()
|
|
|
|
||
1 refers to the access denied page as per the enumeration
defined in SPCustomPage. Same way there are enumerations also for the logout,
sing in page etc.
If you want
to roll back changes, then
|
|
$webapp.UpdateMappedPage(1, $null)
|
|
|
|
||
|
|
$webapp.Update()
| ||||||||||||
Just remember that this settings can only be done at web application level and not to the site collection level.


1 comment:
But the same is not working in sharepoint 2013.
Post a Comment