Showing posts with label Web Parts. Show all posts

Friday, August 9, 2013

Localize site columns, features and web parts

In this post we are going to see how we can localize site columns as well as features.
First let us focus on the site columns.

Create empty SharePoint project.
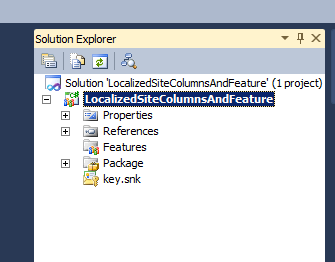


Now right click on project and click on add mapped folder and add resource folder.


Now again click on add new item by right clicking on resource folder and select resource file.


Add these two values


Now add one more resource file for Spanish language. add es-es to the file name as shown in the image below and add below entries.


Now it's time to create empty element where we would be adding the site columns.
Right click on project and add empty element.

Add this to the empty element.


Build and deploy the solution

One thing to consider here is that you need to have language packs installed on the server.
Go to the site settings and site columns. Right now we are with English language.


Change the language to Spanish


As you can see that column title gets converted to the Spanish language.

We already have a feature with us which has site columns element file. Our sole purpose is just to show how features can also be localized. Now right click the feature and click on add feature resource.


Select Spanish from long list of languages.

And add these texts


and then add this to the web part properties


When you have set the language to English, this is what you get


Switch language to Spanish.


Let us add one web part. After that open the same LocalizedSiteColumn.resx under resource folder and add this.


now open the Spanish resource file and add this


Now open the web part file and change the title and description to point it to resource file.

This will also localize the web parts. I hope this helps.

Wednesday, June 13, 2012

Understanding Data Form Web Part in SharePoint 2010/ MOSS 2007 – Part 3


If you have not gone through Part -1 and Part -2 of this series, I would recommend you reading it first and then continue reading from here.

Let’s go ahead and add form actions to data form web part.

Open the page that we had left opened in our previous post also open the list in browser. We are going to add email field to the list. I have entered some dummy email addresses to the list items.


Open SharePoint Designer page and add email field to the data form web part.


Now keeping cursor in email field, right click and then select insert column to right.


Now keeping cursor in that column, go to insert tab and select SharePoint controls, form action control button.


The moment you select the button, it asks you what you want to perform when button is clicked. We are going to select custom action.


So what happens is it generates a workflow that is not associated with the list, nor associated with site or not even with list item. It is independent workflow that can be triggered by the button.

It generates a workflow named form actions workflow 1.

Locate the property of button and change the text of button to send email. 

Now we need to make one more change because we are going to send an email to Email field mentioned in that specific list item, hence we first need to convert that field into a label so that we can make the reference of that field in the workflow.

So select the email field, right click that field and select format item as a label and then save the field.


Now locate the Form actions workflow 1 under workflows tab and open it to modify.


Select action - send an email.


And select these users for email and then select workflow lookup for user


Once you are done with this and if you have email server properly set up, then you should be able to send an email by clicking on that button which will send email to Email field mentioned in that list item.


Monday, June 11, 2012

Understanding Data Form Web Part in SharePoint 2010/ MOSS 2007 – Part 2


If you have not gone through part -1 of this series, I would recommend you reading it first and then continue reading from here.

If you open a page which we designed in previous part in browser and edit the page and then edit the web part, you will see XSL editor and parameters editor.


If you observe closely parameter binding, you will also find our color parameter set there. This way you can also enter multiple parameters binding here as well.


Now let’s get back to designer and select the data form web part. We are going to apply conditional formatting now.

Click on Table tab, then select and then row. This will select the row in data form web part.


Keeping the row selected, select options again and then conditional formatting and then formate row.


Select if color equals to red, and then click set style


Set background to red


Repeat this for remaining colors. Once you set them for different colors, you should have something like this in designer.


Save it and open it in the browser. You’ll see different color rows based on the color field value.


So now if you go and open the web part in edit mode, and see the XSL you will see following written.


Now go to table, select column and then make it bold lettered.


And you can see quantity turning into bold letters


Now we are going to see editing functionality and multi entry on data form web part. For a demo, I have removed the existing web part on a page.

Now find Data View option in ribbon and then manage data sources.


And select stock items colors list. You can select the list you want.

Select the web part and click on inline editing option on the ribbon.


Save it and view it in the browser. You should be able to edit the item without opening it in separate edit page.


You can also select what operation should you allow.


Now coming back to designer, select any empty div on the page and then select title, quantity and color and then click on insert field as multi item form.


And save it and open it to view in browser.


In next post, we are going to see how to use custom actions with the list or library using Designer. Read Part-3 for further reading.

Thursday, June 7, 2012

Understanding Data Form Web Part in SharePoint 2010/ MOSS 2007 – Part 1


We are going to start a new series of data form web part. Data Form web part is one of the most important web part in SharePoint.

 First to start with, let me clear the difference between data form web part and data view web part because this is the most common question arises when it comes to these two web parts.

Data View web part was introduced in WSS 2.0 and Data Form web part was introduced in WSS 3.0. So obviously data form web part is advanced than data view web part. However it depends on what you want to perform.

Data view web part as name suggest only be used to view the data. However data form web part writes back the data to the source as well.

Both web parts can only be created from SharePoint Designer and not from the browser. Both still uses XSLT to transform the data into the representation form. But data form web part uses SPDataSource control to connect with source and fetch the data.

We are going to see what data form web can do.

First it can fetch data not only from SharePoint but also from SQL server, web service, and XML file.

It can also take parameters to display data in it. Parameters can come from query string, it can also be cookie, and it can also be form fields.

So connect with your site via SharePoint Designer. Open a page where you want to add data form web part.

I have one list in site.


Now keep the cursor inside place holder and click on data view and then click on Stock Item colors list.


Once you add it, you get something like this.


At this point of time, just save the file and open the page in browser.


Now go back to designer and select three fields by holding ctrl key and then click on Insert selected field drop down and select multiple items view and you’ll get this.


Again save and check it in browser.


Now let’s go ahead and select the data form web part. Look at the ribbon and you see you can configure different options like group, sorting, filtering and parameters.

Let’s click on sorting option.


Sort by color in ascending order


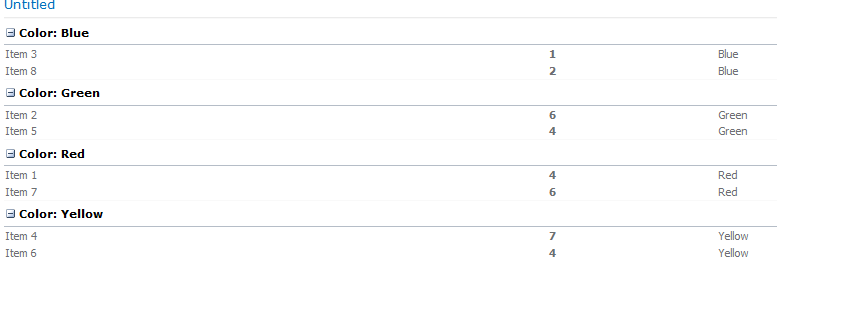
You can also click on show group header option and you get something like this


Save it and view in the browser.

Now we are going to add parameters. So go back to designer and click on parameters option. By default you will see these two parameters.


Go ahead and click on New Parameter and select type as query string. As you can see you have difference option to define the source of this parameter.


Now we have parameter so we now need to configure the filter based on this parameter.
Select data form web part and then click on filter. Then select color as field and set it like this.


Once set you’ll get this in designer. It does not show any data because there are no colors defined now.


Click on sample data in design tab.


Save the page and open the page in browser.

Initially you will see no data. Pass the parameter and value to see data in the web part.


Continue reading Part -2 for further understanding.


Share your SharePoint Experiences with us...
As good as the SharePointKings is, we want to make it even better. One of our most valuable sources of input for our Blog Posts comes from ever enthusiastic Visitors/Readers. We welcome every Visitor/Reader to contribute their experiences with SharePoint. It may be in the form of a code stub, snippet, any tips and trick or any crazy thing you have tried with SharePoint.
Send your Articles to sharepointkings@gmail.com with your Profile Summary. We will Post them. The idea is to act as a bridge between you Readers!!!

If anyone would like to have their advertisement posted on this blog, please send us the requirement details to sharepointkings@gmail.com