We all know that when we create list and few columns we are all set to enter the data in to the list. However many times we get a feedback that can we get this field aligned here, or we just do not want this field to appear in New form, but this field should be present in the Edit form. We often get these requirements.
So the purpose of the post is to show you how to achieve this stuff in SharePoint. Well, the idea is not to touch the default pages of the lists to change anything. Just to give you an idea on this, we will create new page from SharePoint Designer and then utilize that page as a new item page for the list.
I am taking Issues list into the consideration. Any list can be customized like this and any page can be customized like this.
So let’s get started on this.
1) First open the SharePoint Designer.
2) Connect to the SharePoint site.
3) Click on File – New – ASPX Page
4) So go ahead and expand the lists Node.
5) Locate and expand Issues list.
6) You will find six pages that the Issues list has.
Now it is the time to tell the page that we need the layout like New Form of Issues list.
7) Save the ASPX page, your location should be Lists and then Issues.
8) So you will end up having one more aspx page in the Issues List.

9) Click on Insert-SharePoint Controls –Custom List Form

10) At the time of adding it, it asks you what type of form it is. Select New form. You can also select edit or disp based on what you are customizing.

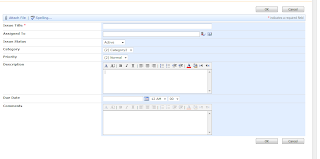
11) So you can see New form entry form been displayed to you on the page.

12) Now here you can customize everything that you want. If you do not want some fields, you can remove that specific


13) Save the page.
14) Now all we need to do is we need to tell SharePoint Designer that attach this ASPX page as NewItem of the Issues list so that when user clicks on NewItem, they should get this page rather than NewItem.aspx which comes default.
15) Open catelogs and master pages node

16) Drag the default.master on the page to attach our custom aspx page to the master page. Save it.
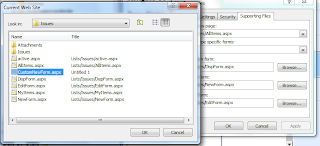
Right click Issues List. Click on properties and go to Supporting Files tab.

17) Browse NewItem Form, locate the CustomNewItem.aspx and click ok.

18) Click Apply, Ok. You are done.
Now open your site and locate the Issues list. Click on New and you should be good to go.

I hope you enjoyed this post and found very useful.
Subscribe to:
Post Comments (Atom)


3 comments:
After step 16, be sure to change "content type specific forms" to Item istead of folder. Otherwise you will click Ok but if you go to List properties again you will see that default form is not changed.
Hi,
I have created the customNewForm.aspx and in the 16th step I followed the procedure and browsed to locate the CustomNewForm and clicked apply and ok.But it is not changing in the list and showing still Newform.aspx in the list. Please can you suggest why it is not changing?
Thanks,
Anil
Thanks R0߀r70, thanks a lot for pointing.
we will update the article accordingly.
Anil, that might resolve your problem as well.
Post a Comment