As we are approaching to some final posts of the series, I feel happy to share these posts with you all and make you aware of all things related to custom activity.
If you have not read previous articles, I recommend you reading Creating custom activity in Workflow Part – 1 First.
Here in this post, we will talk about the visual designer for the custom activity. It has nothing to do with functionality, so definitely this is not something which is required, However it is something which is nice to have.
So let us go ahead and understand how we can create visual appearance of custom activity.
By default when you drag and drop any activity, you will observe the shape and coloring same for each and every activity. We can change the shape, background color, border of our custom activity to give new fresh look. Hence I refer this visualization change of custom activity as makeup of activity. (Remember I used this term in post 1). :)
To achieve this, we need to implement three steps instead of two steps like other posts that we did.
1) Create a class which inherits from ActivityDesigner.
2) Create class which inherits from ActivityDesignerTheme.
3) Add ActivityDesignerTheme attribute to the class which inherits from ActivityDesigner.
4) Add Designer attribute to the Custom activity class.
So let’s start. Add one more class to our custom activity project. Name it CustomActivityDesignerTheme

Then add CustomActivityDesigner class which inherits from ActivityDesigner and add attribute as shown in figure below.

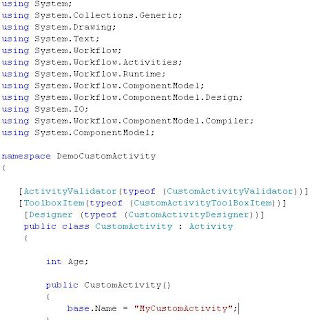
And then add designer attribute to the Custom activity class.

Now again just compile whole custom activity project, add activity to the console application and see the result. You will see our customized theme for our custom activity that we’ve just created.

Read Creating custom activity in Workflow Part – 5 for further reading.


1 comment:
All 4 parts of the "Creating custom activity in Workflow" are excellent.It really helped me a lot.
Thank you so much.
Post a Comment